Recovery guide · Updated 2026
Choosing a Red Light Panel: Wavelengths, Irradiance, EMF & Size
A technical buying guide to consumer LED panels — nm ranges, dual-chip vs quad-chip, irradiance claims, EMF skepticism, and seventeen top-selling panels from desk bricks to full-body fixtures.
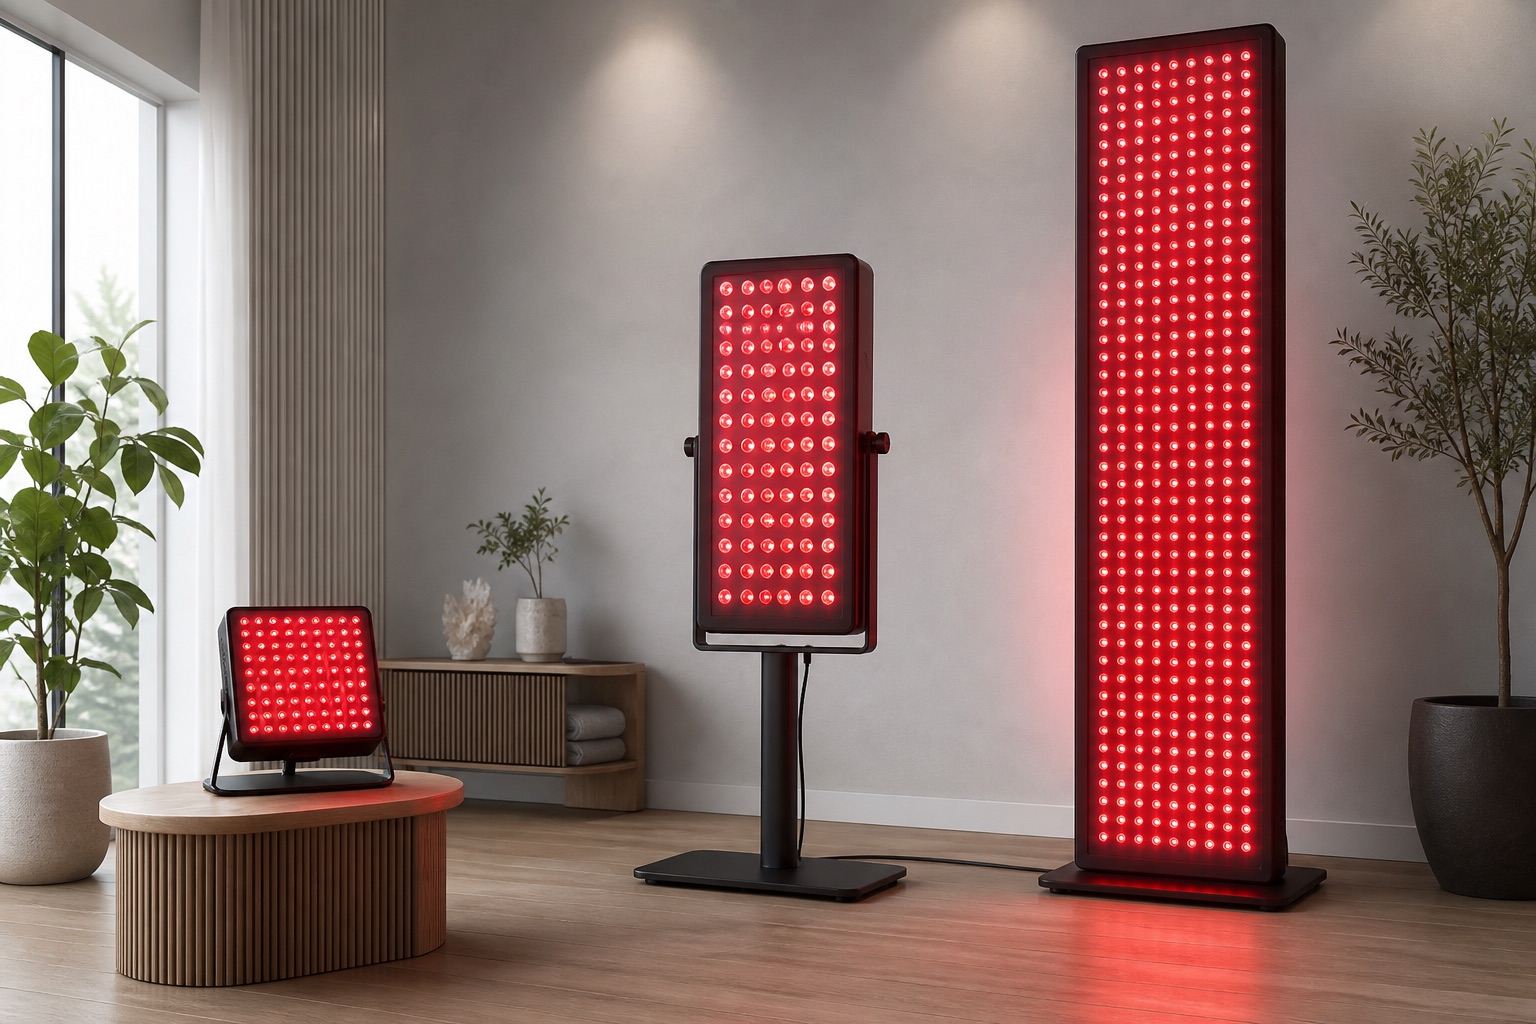
Buying a red light panel is where photobiomodulation gets unromantically technical — which is good news. Wavelengths, irradiance, fluence, LED architecture, coverage, and EMF claims are learnable. What is not learnable is wishful wattage: a “300W” sticker does not dose your mitochondria.
This guide stays on panels only — the stand-off LED fixtures people actually hang, stand, and argue about. For masks, belts, mats, handhelds, and mechanism basics, start with Red Light Therapy: Mechanisms and Use Cases and the form-factor essay Red Light Therapy Devices by Form Factor. Here we go deep on how to compare seventeen top-selling panels across the size and wavelength ladder.
Key takeaways
- Best dual-band mid reference: Hooga HG300.
- Best dual-band full-body Hooga: HG1500 (300 LEDs + hanging kit).
- Best multi-band mid: Hooga Quad-Chip 72 or BestQool 160W.
- Best coverage-per-dollar mega: BestQool 470W / 300 LED.
- Best documentation-first ladder: MitoMIN → MID → MAX → MEGA.
- Best irradiance-claim dual-band mid: EmberTouch 215W (verify measurement method).
- Spec rule: mW/cm² at a stated distance beats watts on the box.
- Biggest buying mistake: sizing for Instagram, dosing by vibes, trusting solar-meter hero numbers.
How we evaluate panels
Editorial scores favor honest optics and usable coverage — not the loudest “clinical grade” adjective. We score across five pillars:
- Wavelength honesty (25%) — red/NIR windows that match common PBM practice.
- Dose transparency (25%) — irradiance-at-distance claims, dual/quad-chip clarity, timer reality.
- Coverage fit (20%) — LED count and panel height for the job.
- Build and ownership (15%) — stand/hang practicality, brand continuity, return-friendly pricing.
- Claim hygiene (15%) — wattage theater, EMF hype, and app features discounted appropriately.
Important limitation: listing specs change. Keersa scores are editorial synthesis. Medical issues need clinicians.
The spec sheet that matters
Wavelength (nm). Dual-band 660/850 is the consumer default. Four-band panels typically add ~630 nm and ~810 nm (BestQool sometimes markets a wider 630–940 nm class). Match bands to targets: red for more superficial work, NIR for deeper reach — then still dose.
Irradiance (mW/cm²) at distance. This is the number. Without distance, irradiance is cosplay. Beam divergence on consumer LEDs is often wide; moving from near-contact to several centimeters can crush intensity. Cronshaw et al.’s home-device pilot work is a useful reminder that manufacturer distance advice frequently under-appreciates optics.
Fluence (J/cm²). Irradiance × time. Parameter reviews show biphasic responses: more is not always better, especially in high-mitochondria tissues.
LED count and chip architecture. More LEDs usually mean a larger uniform field and fewer pose changes. Dual-chip vs quad-chip describes die packaging — architecture, not automatic clinical superiority.
Electrical watts. Useful for circuits and heat. Terrible as a proxy for tissue dose.
EMF. Real enough to respect; over-marketed enough to ignore as a primary scoreboard. Fields generally fall with distance. Prefer solid construction and grounded plugs; do not let “zero EMF” replace irradiance literacy.
Flicker, fans, dimming. Flicker-free claims and brightness control can improve comfort and make irradiance tuning less dependent on shuffling your feet.
A practical measurement mindset
- Prefer spectroradiometer-style data over cheap solar-meter screenshots.
- Compare panels at the same distances you will actually use (often 6 and 12 inches as starting checkpoints).
- Log time. Fluence is a product, not a vibe.
- Protect eyes — especially as LED count and total power climb.
Interactive comparison
Filter by form factor, sort by score or price, and pin up to three options for a focused side-by-side view.
Tradeoff:
Sticker price still matters here — most options are one-time hardware buys, so the three-year estimate mainly reflects purchase price plus expected upkeep.
Estimates are directional and based on common public pricing patterns. Promotions, refurbished units, family plans, and tier changes can move these numbers materially.
3-year cost of ownership
Device
Year 1
3-year estimate
Amazon Price
Hooga HG1500 Full-Body Panel
$950
$1,000
$899
Hooga HG300 Panel
$220
$245
$199
BestQool 470W 300-LED Panel
$820
$870
$755
Hooga Quad-Chip 72-LED Panel
$430
$460
$399
Mito Red Light MitoMEGA 2.0
$1,120
$1,180
$1,049
BestQool 330W 200-LED Panel
$560
$600
$519
Mito Red Light MitoMAX 2.0
$800
$850
$749
Mito Red Light MitoMID 2.0
$480
$510
$449
Hooga Quad-Chip 150-LED Panel
$850
$900
$799
BestQool 160W Four-Wavelength Panel
$330
$360
$303
Hooga Quad-Chip 300-LED Full-Body Panel
$1,480
$1,550
$1,399
Hooga 60 Dual-Chip Panel
$320
$345
$299
Mito Red Light MitoMIN 2.0
$275
$300
$249
EmberTouch 215W Panel
$530
$560
$499.99
Hooga 40-LED Dual Panel
$170
$195
$149
BestQool 50W Dual-Chip Panel
$160
$185
$139
Budget 60 Dual-Chip Panel (300W Class)
$145
$170
$128.59
Architecture decides complexity. Dual-band keeps dosing simple. Four-band adds neighboring red/NIR peaks. Mega panels buy coverage â they do not erase distance math.Dual-band vs multi-band vs mega
Choose a dual-band mid panel if...
Choose a four-band mid or large panel if...
Choose a 150â300 LED full-body class panel if...
Choose a documentation-first brand ladder if...
Below are deeper notes on every option in the comparison table, sorted by editorial score. Jump directly from the table pins or the cost section.
Hooga · Panel
Best for: Full-body dual-band Hooga with 300 LEDs and hanging kit practicality
HG1500 is Hooga’s dual-band full-body workhorse: 300 LEDs, timer, hanging kit. Buy it when you want maximum dual-band coverage without paying for four-wavelength complexity. Door hanging is convenient — measure door thickness, swing clearance, and kid/pet traffic. Dual-band keeps dosing mental model simple at full-body scale. Choose HG1500 for dual-band full-body. Choose Hooga 300-quad when 630/810 bands matter.
Estimated ownership: about $950 in year 1 and
$1,000 over 3 years.
Panel + hanging/mount. Confirm door strength and clearance before hanging.
Hooga · Panel
Best for: The default dual-band mid panel: 60 LEDs, timer, stand, sensible price
HG300 is the panel most people should beat before upgrading: dual-band, timer, stand, 60 LEDs. Buy it to build real dosing habits — then size up only when coverage — not novelty — is missing. Treat 6–12–18 inch distances as different prescriptions. Fluence = irradiance × time at that distance. Dual-band keeps the SKU simple; add 810 nm later only if your protocol needs it. Choose HG300 as the reference mid panel. Choose Hooga dual-chip 60 if you specifically want dual-chip dies.
Estimated ownership: about $220 in year 1 and
$245 over 3 years.
Panel + stand. Add quality goggles for close facial work.
BestQool · Panel
Best for: 300 LED multi-band full-body-class coverage at a price that undercuts many prestige mega panels
BestQool 470W / 300 LED is the coverage-per-dollar apex of the BestQool ladder. Buy it when you want multi-band full-body-class sessions without $1k+ prestige pricing. 300 LEDs help uniformity across torso height — still walk the panel with a plan for front/back sessions. Large panels can produce meaningful EMF near the driver; prefer distance that matches both dose and comfort. Choose 470W for max BestQool coverage. Choose Hooga 300-quad or MitoMEGA for alternate brand ecosystems.
Estimated ownership: about $820 in year 1 and
$870 over 3 years.
Hardware + heavy-duty stand/wall mount. Confirm circuit capacity for continuous sessions.
Hooga · Panel
Best for: Clean 630/660/810/850 nm story in a mid Hooga fixture
Hooga’s 72 quad-chip panel is the tidy four-band mid option: 630/660 plus 810/850. Buy the bands when your use cases span superficial and deeper targets — not because four is luckier than two. 810 nm sits in a frequently studied NIR window; 850 nm remains the consumer NIR staple. Quad-chip packages densify wavelength mix per module. Choose quad-72 for wavelength flexibility. Stay dual-band if your protocol is already 660/850-only.
Estimated ownership: about $430 in year 1 and
$460 over 3 years.
Hardware. Compare against BestQool 160W for multi-band value.
Mito Red Light · Panel
Best for: Prestige mega-panel coverage when Mito testing culture and size ladder top out
MitoMEGA 2.0 is the prestige mega-panel endgame: maximum Mito field with documentation-first branding. Buy it when brand trust and contiguous coverage beat LEDs-per-dollar scoreboards. Mega panels forgive fewer mount mistakes — fix distance, then stop chasing higher wattage stickers. Eye protection and facial fluence control matter more as total power rises. Choose MEGA for Mito max. Choose BestQool 470W or Hooga HG1500 when value coverage wins.
Estimated ownership: about $1,120 in year 1 and
$1,180 over 3 years.
Hardware + robust mount. Compare total to Hooga HG1500 and BestQool 470W before committing.
BestQool · Panel
Best for: Large multi-band coverage below mega-panel pricing with 200 LEDs
BestQool 330W / 200 LED is the value full-body-class multi-band play. Buy it when coverage and wavelength breadth matter more than prestige brands — then mount it so distance is repeatable. Large fields reduce pose changes; irradiance still falls with distance and off-axis angle. Four-band marketing should not replace a written session: distance, time, body regions. Choose 330W for value coverage. Choose 470W when you want the larger BestQool step.
Estimated ownership: about $560 in year 1 and
$600 over 3 years.
Hardware + sturdy mount. Room real estate is the hidden cost.
Mito Red Light · Panel
Best for: Large Mito coverage between MID and MEGA when brand testing culture is non-negotiable
MitoMAX 2.0 is large-panel Mito without jumping to MEGA. Buy it when you want brand-tested large coverage and already reject generic wattage theater. Large panels amplify eye-safety stakes — protect eyes and avoid unplanned high facial fluence. Repeatable mounting distance beats handheld wandering. Choose MAX for large Mito. Choose MEGA when maximum contiguous field is the goal.
Estimated ownership: about $800 in year 1 and
$850 over 3 years.
Hardware + mount. Compare total to BestQool 330W/470W before paying brand premium.
Mito Red Light · Panel
Best for: Mito mid coverage when documentation matters and you outgrew MIN
MitoMID 2.0 is the middle of the Mito ladder: more area than MIN, less commitment than MAX/MEGA. Buy it when coverage — not another wavelength sticker — was what MIN lacked. Mid panels cut repositioning for torso sections versus desk bricks. Ask for irradiance at your intended distance, not a single heroic surface number. Choose MID for Mito sizing. Choose MAX/MEGA when one-pose coverage is the goal.
Estimated ownership: about $480 in year 1 and
$510 over 3 years.
Hardware + optional Mito stand ecosystem.
Hooga · Panel
Best for: Large Hooga four-band panel when you want 630/660/810/850 without jumping to 300 LED
Hooga’s 150 quad-chip panel is large four-band coverage without the 300-LED ceiling. Buy it when Hooga’s wavelength set and brand feel matter more than maximizing LED count. 150 LEDs is a real coverage step above mid panels — still plan front/back passes for full-body goals. Quad-chip four-band continuity from the 72-LED model. Choose 150-quad for Hooga large multi-band. Choose 300-quad or HG1500 for maximum Hooga fields.
Estimated ownership: about $850 in year 1 and
$900 over 3 years.
Hardware + mount. Compare LED count to BestQool 300 LED before deciding.
BestQool · Panel
Best for: Four-wavelength step-up (~630–940 nm class) with 100 LEDs without mega-panel pricing
BestQool 160W is the multi-band mid rung: 100 LEDs and a 630–940 nm story. Buy it when you want wavelength breadth and more area than a 50W brick — then still dose by irradiance × time. Multi-band panels mix superficial red with deeper NIR candidates — pick targets, then verify fluence. 100 LEDs reduce shuffling versus mini panels for thighs and torso sections. Choose 160W for multi-band mid. Choose 330W/470W when LED count is the bottleneck.
Estimated ownership: about $330 in year 1 and
$360 over 3 years.
Hardware + mount. Eye protection for close work.
Hooga · Panel
Best for: Maximum Hooga four-band coverage with brightness control when dual-band HG1500 is not enough
Hooga’s 300 quad-chip full-body panel is the four-band ceiling: max LEDs, brightness control, premium price. Buy it when you specifically want Hooga’s full wavelength set at full-body scale — not as a default flex purchase. Brightness control helps dial irradiance without only changing distance — still log time and distance. At this price, demand the clearest irradiance and EMF documentation you can get. Choose 300-quad for max multi-band Hooga. Choose HG1500 if dual-band full-body is enough.
Estimated ownership: about $1,480 in year 1 and
$1,550 over 3 years.
Hardware + professional-feeling mount. Justify the premium over HG1500 with real multi-band needs.
Hooga · Panel
Best for: Hooga dual-chip mid panel when you want dual dies per module rather than the classic HG300 layout
Hooga’s 60 dual-chip panel is the dual-die twin of the mid-panel idea. Buy it when dual-chip density is the feature you want — not automatically because dual-chip sounds more clinical. Dual-chip packages place red and NIR close together — useful for mixed sessions, not a free irradiance upgrade. Compare measured output at equal distance to HG300 before assuming superiority. Choose dual-chip for die density. Choose HG300 for classic value.
Estimated ownership: about $320 in year 1 and
$345 over 3 years.
Hardware. Compare irradiance claims directly against HG300 before paying the dual-chip bump.
Mito Red Light · Panel
Best for: Brand-led compact panel when documentation and ecosystem matter more than raw LED count
MitoMIN 2.0 is compact PBM with a documentation-first brand. Buy it when you care about published testing culture more than maximizing LEDs per dollar. Prefer brands that publish irradiance at stated distances with method notes (spectroradiometer vs solar meter). Size class favors face/neck — do not expect posterior-chain coverage. Choose MIN for compact Mito. Choose MID/MAX/MEGA when area is the constraint.
Estimated ownership: about $275 in year 1 and
$300 over 3 years.
Hardware. Stands and glasses add optional spend.
EmberTouch · Panel
Best for: Buyers who want a stated irradiance-at-distance claim plus app timer controls on a dual-band panel
EmberTouch 215W is interesting because it puts an irradiance-at-6-inches number on the box. Buy it for dual-band mid coverage with dosing honesty aspirations — then still ask how that number was measured. A published mW/cm² at 6 inches is better than naked wattage — but meter type changes everything. App timers help adherence; they do not validate biphasic dose windows. Choose EmberTouch when irradiance labeling matters. Choose Hooga/Mito when brand ecosystems matter more.
Estimated ownership: about $530 in year 1 and
$560 over 3 years.
Hardware. App is a convenience layer, not a subscription requirement for basic use on many listings.
Hooga · Panel
Best for: Compact Hooga dual-band with timer when you want brand continuity without HG300 size
Hooga’s 40-LED dual panel is the compact sibling of the HG300: same wavelength logic, less area. Buy it for face and small zones — graduate when repositioning gets annoying. Timers help standardize fluence once irradiance at your distance is known. Fewer LEDs mean narrower uniform field — edges fall off faster. Choose 40-LED for compact dual-band. Choose HG300 when 60 LEDs better match your targets.
Estimated ownership: about $170 in year 1 and
$195 over 3 years.
Panel + optional stand accessories.
BestQool · Panel
Best for: Named-brand entry dual-chip panel for face, neck, and small targets
BestQool’s 50W dual-chip is the named-brand starter brick: small, dual-band, honest about being a face/limb tool. Buy it when coverage needs are small — not when you want one-pose torso dosing. Match panel height to the job. Face and neck do not need 300 LEDs. Rated watts ≠ irradiance at 6 inches. Demand distance-labeled mW/cm² when comparing to larger BestQool units. Choose 50W for focused work. Step to 160W+ when body coverage becomes the bottleneck.
Estimated ownership: about $160 in year 1 and
$185 over 3 years.
Hardware + goggles. Electricity is negligible.
Generic dual-chip · Panel
Best for: Cheapest dual 660/850 dual-chip experiment when you accept opaque irradiance marketing
The budget 60 dual-chip “300W class” panel is how many people first buy PBM hardware. Use it to learn distance and time — distrust the wattage number until someone measures irradiance at 6 and 12 inches. Wall wattage and LED count are not tissue dose. Ask for mW/cm² at a stated distance or measure it. Dual-chip usually means red + NIR dies in one package — good for dual-band sessions if output is real. Choose this to spend less while learning. Skip it if you need published spectroradiometry.
Estimated ownership: about $145 in year 1 and
$170 over 3 years.
Hardware plus optional goggles. Budget panels may fail earlier — keep return windows in mind.
Detailed reviews
Hooga HG1500 Full-Body Panel
Pros
Cons
Choose this if
Skip this if
Hooga HG300 Panel
Pros
Cons
Choose this if
Skip this if
BestQool 470W 300-LED Panel
Pros
Cons
Choose this if
Skip this if
Hooga Quad-Chip 72-LED Panel
Pros
Cons
Choose this if
Skip this if
Mito Red Light MitoMEGA 2.0
Pros
Cons
Choose this if
Skip this if
BestQool 330W 200-LED Panel
Pros
Cons
Choose this if
Skip this if
Mito Red Light MitoMAX 2.0
Pros
Cons
Choose this if
Skip this if
Mito Red Light MitoMID 2.0
Pros
Cons
Choose this if
Skip this if
Hooga Quad-Chip 150-LED Panel
Pros
Cons
Choose this if
Skip this if
BestQool 160W Four-Wavelength Panel
Pros
Cons
Choose this if
Skip this if
Hooga Quad-Chip 300-LED Full-Body Panel
Pros
Cons
Choose this if
Skip this if
Hooga 60 Dual-Chip Panel
Pros
Cons
Choose this if
Skip this if
Mito Red Light MitoMIN 2.0
Pros
Cons
Choose this if
Skip this if
EmberTouch 215W Panel
Pros
Cons
Choose this if
Skip this if
Hooga 40-LED Dual Panel
Pros
Cons
Choose this if
Skip this if
BestQool 50W Dual-Chip Panel
Pros
Cons
Choose this if
Skip this if
Budget 60 Dual-Chip Panel (300W Class)
Pros
Cons
Choose this if
Skip this if
The size ladder (desk brick to wall)
Entry / face-limb (~24–60 LEDs): BestQool 50W, Hooga 40, budget 60 dual-chip, Hooga HG300, MitoMIN. Learn distance and time here.
Mid / multi-band (~72–100 LEDs): Hooga 60 dual-chip, BestQool 160W, Hooga quad-72, MitoMID, EmberTouch 215W. Buy when coverage or wavelength breadth — not boredom — is the upgrade reason.
Large / full-body class (~150–300 LEDs): BestQool 330W/470W, MitoMAX/MEGA, Hooga 150-quad, HG1500, Hooga 300-quad. Buy when one-pose coverage is the adherence feature.
How to choose
- Name the tissue and weekly habit. Face three times weekly ≠ full posterior chain daily.
- Pick dual-band vs multi-band on purpose. Default dual-band unless you have a reason for 630/810-class extras.
- Size for coverage, not ego. Mid panels teach; mega panels stick when mid panels fail adherence.
- Interrogate irradiance claims. Distance + method > wattage.
- Plan mount, eyes, and EMF distance together. One geometry should satisfy dose and comfort.
Quick recommendations by persona
- First serious panel: Hooga HG300
- Budget dual-chip experiment: Budget 60 dual-chip or BestQool 50W
- Documentation-first compact: MitoMIN 2.0
- Multi-band mid: Hooga Quad-Chip 72 or BestQool 160W
- Irradiance-labeled dual-band mid: EmberTouch 215W
- Value full-body multi-band: BestQool 470W / 300 LED
- Dual-band full-body Hooga: HG1500
- Prestige mega: MitoMEGA 2.0
- Max Hooga four-band: 300 quad-chip full-body
No. Wattage on a listing is usually electrical input or a marketing power class. Irradiance is optical power density at your skin (mW/cm²) at a stated distance. Fluence (J/cm²) is irradiance × time. Buy panels with distance-labeled irradiance when you can — and be suspicious of heroic numbers measured with the wrong meter. Most evidence-minded consumer panels center on red (~630–660 nm) and near-infrared (~810–850 nm). Dual-band 660/850 is the default. Four-band designs add neighboring peaks (often 630 and 810). Extra bands are useful when your protocol needs them — not because a longer brochure is healthier. It describes LED packaging: multiple dies (wavelengths) in one module. Dual-chip usually pairs red + NIR. Quad-chip often packs four peaks. Chip count is architecture, not automatic proof of higher tissue dose. Wherever your intended irradiance lives. Beam divergence means intensity falls quickly with distance — consumer LED devices often spread widely, so “a little farther” is not a minor tweak. Pick a repeatable distance, time the session, and stop improvising every day. Treat “zero EMF” marketing as a claim to verify, not a personality. Drivers and wiring create fields that usually drop with distance. Prefer grounded, well-built panels, keep treatment distance that already matches your dose plan, and ignore EMF fear as a substitute for irradiance literacy. Only if coverage and adherence demand it. A mid panel (around 60 LEDs) teaches dosing. Jump to 150–300 LED class when repositioning is killing consistency — not because bigger looks more scientific on a shelf. No. Panels aim at photobiomodulation dosing. Saunas are heat tools. See Infrared vs Traditional Heat Physiology for thermal gear, and Red Light Therapy: Mechanisms and Use Cases for form-factor context.Choosing a red light panel FAQ
Is panel wattage the same as irradiance?
+
What wavelengths should a serious panel include?
+
What does dual-chip or quad-chip mean?
+
How far should I stand from a panel?
+
Should I worry about EMF?
+
Do I need a full-body panel?
+
Are panels the same as infrared saunas?
+
This comparison is designed for practical decision-making. Product capabilities, pricing, and memberships change quickly, so treat battery claims, plan costs, and feature availability as moving targets.
Why wavelength, irradiance, and fluence interact — and why “more watts” without a measurement distance is not a protocol. Mechanism backdrop for why red (~630–660 nm) and NIR (~810–850 nm) windows dominate serious panel designs. Consumer LED devices often have wide beam divergence; irradiance collapses with distance — manufacturer distance advice frequently ignores optical reality. Clinical overview of wavelength windows and why depth targets differ between red and NIR.
Related Keersa guide: Red Light Therapy — Mechanisms and Use Cases
Form-factor overview (panels vs masks vs belts vs mats) before you commit to a panel size ladder.
Related Keersa blog: Red Light Therapy Form Factors
Which shell the LEDs should live in — including handhelds, bulbs, mats, and hair caps — before you size a panel.
Affiliate disclosure: some product links on Keersa Health may earn a commission at no extra cost to you.
Editorial recommendations are independent of commercial relationships.
Read our full disclosure.
Sources and editorial notes
Bottom line
Start with the overview if you have not yet: The Recovery Protocol.
Start with mechanisms if you have not yet: Red Light Therapy: Mechanisms and Use Cases.
Choose a panel like an optic, not a talisman. Dual-band mid panels (HG300 class) teach dosing. Multi-band mids add wavelength options. 150–300 LED fixtures buy coverage and adherence. Prestige brands buy documentation culture — sometimes worth it, never a substitute for mW/cm² at a real distance. Related: Infrared vs Traditional Heat Physiology when the “red light” product is actually a heater.
Next in Recovery: Pneumatic Compression Boots — sequential chambers, pressure windows, and what the evidence actually supports.